What Paint Inside Char Broil Grill
Want to give your Char Broil grill a fresh new look? You’re in the right place!
In this article, we’ll show you how to paint the inside of your grill using the right type of paint and the proper steps.
With our tips, you’ll achieve a smooth and long-lasting finish that will make your grill look brand new.
So, let’s get started and give your grill a makeover!
Types of Paint Suitable for Char Broil Grill
There are several types of paint that are suitable for a Char Broil grill. One popular option is high temperature paint, specifically designed to withstand the extreme heat inside a grill. This type of paint can handle temperatures up to 1200 degrees Fahrenheit, ensuring that it won’t peel or chip off when exposed to the intense heat generated by the grill. High temperature paint is typically available in aerosol cans, making it easy to apply and providing a smooth and durable finish.
Another suitable option for painting a Char Broil grill is enamel paint. Enamel paint is known for its durability and resistance to heat, making it an excellent choice for grills. It can withstand high temperatures and offers good protection against rust and corrosion. Enamel paint is available in a wide range of colors, allowing you to customize the look of your grill according to your preferences.
When selecting paint for your Char Broil grill, it is important to choose a product that is specifically formulated for high temperatures. This will ensure that the paint adheres properly and provides long-lasting protection for your grill. Always follow the manufacturer’s instructions for preparation and application to achieve the best results.
Preparing the Grill Surface for Painting
To prepare the surface for painting, you’ll want to clean it thoroughly and remove any rust or debris. Follow these steps to ensure a smooth and long-lasting paint job for your grill:
-
Start by cleaning the grill surface using a grill brush and warm, soapy water. Scrub off any grease, grime, or food residue. This will help the paint adhere better and provide a clean canvas for your new paint job.
-
Next, inspect the grill for any signs of rust. If you notice any rusty areas, use a wire brush or sandpaper to remove the rust. This will prevent the rust from spreading and ensure a more even paint finish.
-
After cleaning and rust removal, it’s time to apply primer to the grill surface. Primer helps the paint adhere better and provides an extra layer of protection against the elements. Choose a high-quality metal primer that is suitable for outdoor use.
By following these steps, you’ll be well on your way to preparing the grill surface for painting. Remember to allow the primer to dry completely before applying the paint.
Once the surface is prepped and ready, you can proceed to paint your grill with confidence, knowing that you’ve taken the necessary steps for a professional-looking finish.
Steps to Paint the Inside of a Char Broil Grill
After cleaning and priming the surface, you’re ready to start applying the new coat of paint to the interior of your Char Broil grill. Choosing the right paint for your grill is crucial to ensure its longevity and prevent rust.
When it comes to painting the inside of your grill, it’s essential to use a high-temperature paint specifically designed for grills. These paints are formulated to withstand the heat generated by the grill and provide excellent adhesion to the metal surface.
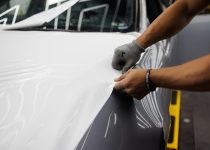
Before you start painting, make sure the grill is completely dry and free of any grease or debris. Apply the paint in thin, even coats, using a brush or a spray can, following the manufacturer’s instructions. Avoid applying a thick layer of paint, as it can lead to drips and uneven coverage.
Once you’ve finished painting, allow the grill to dry thoroughly before using it. This drying process is crucial to ensure the paint fully adheres to the surface and forms a protective barrier against rust. Remember, preventing rust on your grill is essential for its longevity and performance.
Tips for Achieving a Smooth and Long-lasting Finish
For a smooth and long-lasting finish, make sure you properly prepare the surface before applying the high-temperature paint.
When it comes to painting techniques for your char broil grill, there are a few common mistakes to avoid. One of the most important steps is to thoroughly clean the surface before painting. Use a wire brush or sandpaper to remove any rust, grease, or old paint. This will ensure that the paint adheres properly and lasts longer.
Additionally, make sure to prime the surface before applying the high-temperature paint. Primer helps the paint adhere better and provides an extra layer of protection against heat and moisture.
Another common mistake is applying too thick of a coat. A thin and even coat of paint is key to achieving a smooth finish. Multiple thin coats are better than one thick coat.
Lastly, allow each coat of paint to dry completely before applying the next one. Rushing this step can lead to a less durable finish.
Curing and Seasoning the Painted Grill
Now that you’ve finished painting, it’s time to begin the process of curing and seasoning your newly painted grill. This step is essential to ensure the longevity and performance of your grill.
Here are three key benefits of the curing process and why seasoning is important:
-
Protects against rust: Curing involves heating the grill to a high temperature, which helps to eliminate any moisture or impurities that may have been trapped in the paint. This process creates a protective barrier that prevents rust from forming on the metal surfaces of your grill.
-
Enhances flavor: Seasoning your grill involves applying a thin layer of oil to the interior surfaces and heating it. This creates a non-stick surface that enhances the flavors of your food. Over time, as you use your grill, the seasoning will continue to build up, resulting in a more flavorful cooking experience.
-
Improves heat distribution: By curing the paint and seasoning your grill, you can improve the heat distribution throughout the cooking surface. This ensures that your food cooks evenly and reduces the risk of hot spots.
Taking the time to properly cure and season your newly painted grill will not only extend its lifespan but also enhance your grilling experience. So, fire up your grill and enjoy delicious meals with the added benefits of a properly seasoned surface.
Maintenance and Touch-up for Painted Char Broil Grills
To maintain and touch up your painted Char Broil grill, make sure you regularly clean the exterior surfaces and inspect for any chips or scratches that may need to be repaired.
Keeping your grill looking fresh not only enhances its appearance but also helps prevent rust from forming. Start by cleaning the exterior with mild soap and water, using a soft cloth or sponge. Avoid using abrasive cleaners or tools that could scratch the paint.
After cleaning, carefully inspect the surface for any areas where the paint has chipped or scratched off. To touch up these spots, use a high-temperature grill paint that matches the color of your grill. Shake the paint can well and apply a thin, even coat to the damaged area, following the manufacturer’s instructions.
Allow the paint to dry completely before using the grill again. Regular maintenance and touch-up techniques will help extend the life of your painted Char Broil grill and keep it looking great for many seasons to come.
Conclusion
In conclusion, painting the inside of your Char Broil grill is a great way to protect and enhance its appearance. By choosing the right type of paint and properly preparing the surface, you can achieve a smooth and long-lasting finish.
Remember to cure and season the painted grill before use, and regularly maintain and touch-up the paint as needed. With these steps, your Char Broil grill will not only cook great food, but also look great while doing it.
Can Louvered Pergolas Be Modified Once Installed?

Exploring Affordable Backyard Outdoor Furniture Options
How to Make Kebobs in Rotisserie Oven-Vidio
About Author
Rohan C.
Rohan wants to build his own dream backyard to get away from their busy home life. And he also helps bring design to life and build it for his customers using high quality products and building techniques. Rohan has provided many colorful ideas including a water fountain, gazebo, pergola, BBQ area, splash pad, sandbox, and decking with a built-in barbecue.