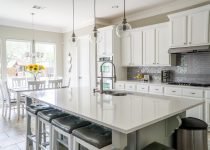
Stenciling Hardwood Floors for a Unique Look
You can turn your hardwood floors into a one-of-a-kind masterpiece with stenciling. First, prep your floor by cleaning it with TSP and sanding it smooth. Then, apply a thin layer of paint to your stencil, and carefully align it with the center of the room. Use a low-VOC paint and Minwax Pre-stain conditioner to ensure a smooth, even finish. Once you've stenciled and stained, seal your design with Minwax Ultimate Floor Finish Polyurethane and maintain it regularly to keep it looking its best – and you'll be on your way to a floor that truly reflects your personal style.
Key Takeaways
- Clean the floor thoroughly with TSP or a substitute before stenciling to ensure a smooth finish and even paint application.
- Choose the right paint type, such as water-based or low-VOC, to minimize fumes and achieve a professional look.
- Apply a thin layer of paint to stencils in small sections to prevent smudging and maintain clarity.
- Lightly sand the surface between each coat of polyurethane to ensure a smooth finish and protect the stenciled design.
- Regular maintenance, including dust removal and gentle cleaning, helps maintain the longevity and appearance of the stenciled design.
Preparing Your Floor for Stenciling
To start stenciling your hardwood floor, you need to give it a thorough preparation.
Clean your floor using TSP or a suitable substitute to remove any grease, dirt, or debris, ensuring a smooth surface for stenciling. Sand the floor with 220-grit sandpaper to achieve a smooth finish and enhance paint adhesion, followed by vacuuming to eliminate dust particles.
Identify the central point of the room using measuring tape and mark midpoints on walls to ensure accurate stencil alignment throughout the project.
Prepare your materials, including stencil brushes, and keep them nearby to streamline the stenciling process.
Finally, allow ample drying time between steps, as a minimum of 12 hours is recommended after applying the primer and base coat to ensure durability and prevent smudging.
Stenciling and Staining Techniques
Start by applying a thin layer of paint to your stencils, working in small sections to maintain clarity and avoid smudging. This allows for easy repositioning and prevents smudging.
When choosing paint, consider using a water-based or low-VOC option to minimize fumes and odor.
- You'll need to clean your floor thoroughly before stenciling, using a product like TSP to eliminate dirt and grease.
- Apply Minwax Pre-stain conditioner to prevent blotchiness when staining.
- Use a single coat of Minwax Stain (Puritan Pine) for an even finish on patterned areas.
- Seal your stenciled floor with three coats of Minwax Ultimate Floor Finish Polyurethane.
- Light sanding between coats ensures durability and protects the design from wear.
Sealing and Maintaining Your New Floor
After completing the stenciling process, your hardwood floor is now ready to be sealed, and the right maintenance will help ensure its longevity.
To seal your floor, apply three coats of a durable finish like Minwax Ultimate Floor Finish Polyurethane in Satin. Use a Super Fine sanding sponge to lightly sand the surface between each coat, ensuring a smooth finish and protecting the stenciled design.
Regular maintenance is key; promptly remove dust and debris with a Dustbuster or rag to avoid damaging the finish. For high-traffic areas, consider reinforcing the finish with extra coats if needed.
Clean your floor with a gentle cleaner like Mrs. Meyers to maintain the longevity of your stenciled designs.
Frequently Asked Questions
What Color Hardwood Floors Never Go Out of Style?
You'll never go wrong with neutral colors like natural oak, walnut, and ashy grey, which complement various decor styles and stand the test of time, while darker shades like espresso and lighter shades like pale birch also remain popular.
Where to Start When Stenciling a Floor?
When starting a stencil project, you'll want to begin by thoroughly cleaning the surface to ensure a strong bond between the paint and floor. Remove dirt and grime with a TSP cleaner, then dry it completely before moving on.
How Can I Make My Hardwood Floors Look Better Without Refinishing?
You can easily give your hardwood floors a facelift without refinishing by adding a fresh coat of paint or trying a DIY project, like stenciling, to hide imperfections and add visual interest without breaking the bank.
What Is the Best Timeless Hardwood Floor Color?
You'll want a timeless hardwood floor color that complements your space. Classic shades like light oak and walnut, darker hues like espresso, or neutral colors like grey and beige are great options that won't go out of style.
Cuisinart-Rotisserie Tob200 Toaster Oven-Wat the Folloving Accessopies Includes
Installing Safety Barriers Around Your Grill Island

How to Reheat Rotisserie Chicken From Store
About Author
Rohan C.
Rohan wants to build his own dream backyard to get away from their busy home life. And he also helps bring design to life and build it for his customers using high quality products and building techniques. Rohan has provided many colorful ideas including a water fountain, gazebo, pergola, BBQ area, splash pad, sandbox, and decking with a built-in barbecue.