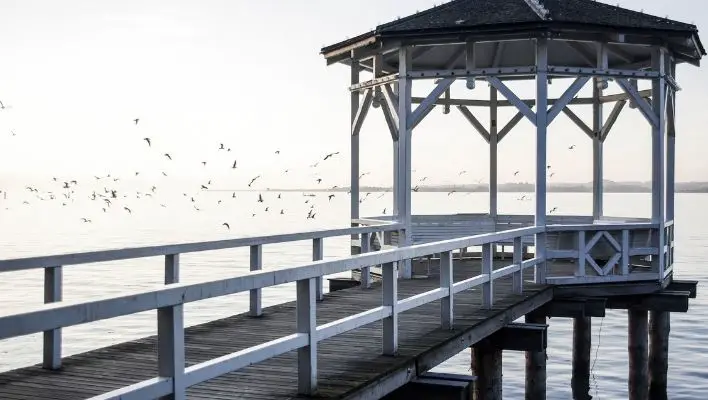
Crafting The Perfect Gazebo Roof Cap: Diy Tips
There’s nothing quite like spending a warm, sunny afternoon relaxing in the comfort of your own backyard gazebo. It’s the perfect spot to enjoy some fresh air and take in the sights and sounds of nature.
But as you sit back and admire your handiwork, you might notice that something is missing – a touch of elegance that completes the look. That’s where a roof cap comes in! Not only does it add an eye-catching finishing touch to your gazebo, but it also helps protect your structure from water damage.
If you’re looking for a fun and rewarding DIY project to spruce up your outdoor space, crafting the perfect gazebo roof cap is right up your alley. You don’t need to be an expert woodworker or have access to fancy tools; with some basic supplies and our handy tips, you’ll create a stunning addition to your gazebo that’ll have everyone talking.
So let’s dive into the world of roof caps and discover how you can elevate your backyard haven with this simple yet impactful project.
Choosing The Right Material
Choosing the right material for your gazebo roof cap is essential to ensure its durability and aesthetic appeal. There are several factors to consider when selecting a roofing material, including the climate, surrounding environment, and your personal style preferences. By taking these factors into account, you’ll be able to craft a roof cap that not only looks great but also provides optimal protection for your gazebo.
Among the various options available, some popular materials for gazebo roof caps include wood, metal, and synthetic materials like vinyl or PVC.
Wood provides a classic look and can be easily customized with paint or stain to match your existing gazebo. However, it may require more maintenance than other materials due to its susceptibility to rot and weathering.
Metal caps (such as copper or steel) offer an attractive alternative that’s both durable and low-maintenance. They are especially well-suited for areas prone to extreme weather conditions or fire hazards.
Synthetic options like vinyl or PVC may be more budget-friendly and offer greater flexibility in design choices but might not provide the same level of durability as wood or metal.
To make the best decision for your gazebo roof cap material, it’s important to weigh the pros and cons of each option against your specific needs and preferences. Consider how much time you’re willing to dedicate to maintenance, as well as any environmental factors that could affect the lifespan of your chosen material. By doing so, you can create a stunning roof cap that will enhance the overall appeal of your outdoor living space while providing long-lasting protection for your gazebo.
Planning And Designing Your Roof Cap
Let’s start by discussing the materials we’ll need for our roof cap. After that, we’ll figure out what type of design plan we should go with.
We’ll need to make sure that whatever materials we choose are durable and of high quality. Once we choose our materials and design plan, we can start crafting our roof cap.
Choosing Materials
So, you’re ready to take your gazebo to the next level with a stylish and functional roof cap, but where do you start?
The first step in planning and designing your roof cap is selecting the right materials. You’ll want something that not only looks great but also stands up to the test of time and weather conditions.
Let’s dive into some options for materials that will make your gazebo roof cap shine!
Wood is a classic choice for a gazebo roof cap, offering a timeless look and natural warmth. When choosing wood, consider cedar or redwood for their durability and resistance to decay. These types of wood can be stained or painted to match your gazebo’s design, giving you a cohesive look throughout. However, keep in mind that wood may require more maintenance than other materials, as it can be susceptible to damage from insects and weather.
If you’re looking for something low-maintenance and weather-resistant, metal might be the perfect option for your gazebo roof cap. Aluminum or galvanized steel are excellent choices due to their lightweight nature and resistance to rust. Metal also offers versatility in design with various shapes, sizes, and finishes available – allowing you to create a unique look tailored to your taste. One downside of metal is that it can become hot under direct sunlight; however, this shouldn’t pose too much of an issue if your gazebo has enough shade coverage from the surrounding structure.
Creating A Design Plan
Now that you’ve explored material options for your gazebo roof cap, it’s time to create a design plan that will bring your vision to life.
Start by considering the overall style and aesthetic of your existing gazebo, as well as the surrounding landscape. You’ll want to choose a roof cap design that complements these elements while adding a touch of individuality.
When planning your design, think about factors such as shape, size, and detailing. For example, do you prefer a simple square or rectangular roof cap, or are you drawn to more intricate designs like an octagonal or hexagonal shape?
Additionally, consider if you’d like to incorporate any decorative elements such as finials or weathervanes for added flair. Sketch out your ideas on paper or use computer-aided design software to help visualize the finished product.
With all these considerations in mind, you’re well on your way to designing a stunning roof cap that will elevate the look and feel of your gazebo. Remember that this is an opportunity to express your personal taste and creativity – so don’t be afraid to think outside the box!
Gathering Necessary Tools And Supplies
Now that you’ve meticulously planned and designed your roof cap, it’s time to gear up for the actual construction process. In this section, we’ll discuss how to gather all the necessary tools and supplies needed to bring your vision to life. With everything in place, you’ll be well on your way to crafting the perfect gazebo roof cap.
The first step in gathering materials is determining the type of roof cap you want based on your design plans. Common materials for gazebo roof caps include wood, metal, or vinyl. Each material has its own set of benefits and drawbacks, so choose one that best fits your needs and preferences.
For example, wooden roof caps tend to be easier to work with but may require additional maintenance over time; whereas, metal or vinyl options can offer better durability but might be more challenging for a DIY project.
Once you’ve decided on your preferred material, it’s time to create a list of necessary tools and supplies. Some essential tools you’ll need are a saw (or power saw) for cutting materials, a hammer (or nail gun) for securing pieces together, a drill for creating holes or pilot holes when needed, measuring tape or ruler, carpenter’s square or level for ensuring accuracy in angles and alignment, sandpaper or an electric sander for smoothing out rough edges (particularly if using wood), paintbrushes or rollers if painting or staining is part of your design plan.
Don’t forget about safety equipment such as gloves and safety glasses! Additionally, make sure you have enough nails or screws appropriate for the material being used. You may also want extra supplies like adhesive caulk or sealant depending on whether waterproofing is necessary.
With these tips in mind, gathering all the required tools and supplies should be a breeze. Ensure that everything is organized before starting construction – this will save time and make the process run smoothly.
By having everything ready beforehand, you can focus solely on crafting the perfect gazebo roof cap that will be the crowning glory of your outdoor space.
Cutting And Shaping The Components
First, let’s talk about Choosing the Right Materials – you’ll need to make sure you get something that’s durable, yet lightweight.
Next, Marking Out the Pieces – this is where you’ll want to use a ruler to measure and mark out the pieces so that your roof cap fits perfectly.
After that, it’s time to get cutting and shaping – this is where having the right tools is essential.
Lastly, don’t forget to sand down any rough edges – you want your roof cap to look seamless and professional.
Choosing The Right Materials
To create an exquisite gazebo roof cap, one must carefully consider the materials to be used for cutting and shaping the components. It’s essential to choose materials that are not only visually appealing but also durable and weather-resistant. By being selective in your choice of materials, you’ll ensure a longer-lasting and more attractive end product.
When selecting materials for your gazebo roof cap components, it’s crucial to take into account factors such as climate, maintenance requirements, and overall design aesthetic.
For instance, if you live in an area with harsh weather conditions or high winds, you might opt for heavier-duty materials like metal or treated wood. On the other hand, if you’re seeking a more lightweight option with minimal upkeep, plastic or aluminum could be preferable choices.
Additionally, don’t forget to think about how the chosen material will complement the rest of your gazebo’s design. After weighing all these factors and deciding on the most suitable material for your project, it’s time to cut and shape the components of your gazebo roof cap.
Be sure to measure accurately before making any cuts and follow proper safety guidelines when using tools like saws or drills. With careful planning and attention to detail, you’ll be well on your way to crafting a stunning and functional roof cap that adds both beauty and value to your outdoor space.
Marking Out The Pieces
Now that you’ve chosen the ideal material for your gazebo roof cap, it’s time to mark out the pieces before cutting and shaping them. This step is crucial because it ensures each component will fit together seamlessly, creating a sturdy and visually appealing structure.
To achieve this, you’ll need to accurately measure and mark out each piece based on the design specifications of your gazebo. Using a tape measure, ruler, or other measuring tools, carefully determine the dimensions of each component and make clear markings on the material.
You might find it helpful to use a pencil or chalk for this step, as these can be easily erased or wiped away if adjustments are needed. Be sure to double-check all measurements before proceeding with any cuts; remember that precision is key in this process.
With all pieces marked out accurately, you’re ready to begin cutting and shaping your gazebo roof cap components. By taking the time to ensure precise measurements and markings, you’re setting yourself up for success in crafting a stunning roof cap that enhances both the aesthetics and functionality of your outdoor space.
Assembling And Securing Your Creation
Now that you’ve carefully crafted your beautiful gazebo roof cap, it’s time to put the finishing touches on it by assembling and securing it in place. This process may seem daunting, but with the right tools and attention to detail, you’ll have a stunning addition to your gazebo in no time.
In this section, we’ll walk you through the steps of attaching your new roof cap securely so it withstands any weather conditions and adds an elegant touch to your outdoor space. To begin with, make sure your gazebo is clean and free of debris before attempting to install your new roof cap.
As for tools, you’ll need a drill, screws or nails (depending on your gazebo’s material), a ladder or scaffolding for safe access to the roof, and possibly a friend or family member to help keep things steady as you work. This is particularly important if you’ve opted for a larger or more ornate roof cap design.
Start by positioning the cap evenly on top of the gazebo’s peak; double-check its alignment before moving forward. Once you’re satisfied with the placement of your roof cap, use your drill to create pilot holes where each screw or nail will go. Keep in mind that placing these fasteners at equal intervals will not only ensure that the cap remains secure but also add visual balance to its appearance.
With pilot holes drilled, gently insert screws or nails into each hole while being careful not to damage the surrounding materials or mar the finish on your meticulously crafted roof cap. Don’t forget to use weather-resistant fasteners to prevent rusting over time!
There’s no need for ‘In conclusion’ statements here – just follow these steps carefully and enjoy admiring your handiwork once completed.
Installing And Maintaining The Finished Product
Ah, the pièce de résistance of your gazebo – the roof cap! Once you’ve crafted the perfect roof cap for your gazebo, it’s essential to properly install and maintain it to ensure that your creation stands the test of time. Not only will a well-installed and maintained roof cap keep your gazebo looking pristine, but it will also protect its occupants from harsh weather conditions.
Proper installation is crucial in ensuring that your gazebo remains safe for use. To achieve this, follow these simple steps:
- Carefully measure the diameter of the hole at the top of your gazebo’s roof.
- Ensure that the size of your roof cap matches or slightly exceeds the measured diameter.
- Use durable materials such as stainless steel screws and waterproof adhesive to affix your meticulously crafted roof cap firmly onto the top of your gazebo.
- Inspect all joints and seams to confirm that they are securely fastened and watertight.
Maintenance is key in preserving both form and function. It’s important to routinely check for damage incurred by harsh weather or natural wear-and-tear so that you can address issues promptly before they escalate into costly repairs. Pay special attention to areas where water might accumulate or debris could become trapped, as these can lead to rot and other structural problems if left unattended. Cleaning your roof cap regularly with a soft brush or cloth will help prevent dirt buildup, which could mar its aesthetic appeal.
In essence, crafting an exquisite gazebo roof cap is just one part of ensuring that you have a beautiful and enduring structure. By taking care during installation and committing to regular maintenance checks, you’ll be able to enjoy an elegant addition to your outdoor space for years to come.
So go forth, create that masterpiece, and enjoy many delightful moments under its protective shelter!
Frequently Asked Questions
What Are Some Alternative Materials To Consider For A Unique Or Eco-Friendly Gazebo Roof Cap?
When considering alternative materials for a unique or eco-friendly gazebo roof cap, various options can provide both aesthetic appeal and environmental benefits.
Reclaimed wood is an excellent choice for adding character while reducing waste, as it’s sourced from old structures like barns and warehouses.
Recycled metal roofing materials, such as aluminum or steel, are also sustainable options that offer durability and resistance to weather elements.
For those seeking a more natural look, living roofs made of plants can help insulate the gazebo and promote biodiversity in your garden.
Additionally, using reclaimed slate or clay tiles can add a touch of elegance while being environmentally conscious.
By exploring these alternatives, you’ll create a truly distinctive and eco-friendly gazebo roof cap.
How Can I Customize My Gazebo Roof Cap To Match The Style And Aesthetics Of My Garden Or Outdoor Space?
To customize your gazebo roof cap to match the style and aesthetics of your garden or outdoor space, consider incorporating design elements and colors that complement your existing landscape.
You can achieve this by selecting a material that matches other structures or features in your garden, such as wood, metal, or eco-friendly alternatives.
Additionally, you can paint or stain the roof cap to coordinate with surrounding elements, add decorative accents like finials or weathervanes, or incorporate greenery such as climbing vines for a more natural look.
Remember that personal touches will help create a harmonious design while showcasing your unique style.
Are There Any Common Mistakes Or Pitfalls To Avoid While Crafting And Installing A Gazebo Roof Cap?
While crafting and installing a gazebo roof cap, it’s essential to avoid common mistakes or pitfalls to ensure a successful project.
Some key issues to watch out for include selecting the wrong materials, improper measurements, inadequate ventilation, and poor installation techniques.
By choosing weather-resistant materials that match your gazebo’s style and carefully measuring all components, you’ll prevent issues with fit and durability.
Additionally, don’t forget to provide proper ventilation to prevent moisture buildup and potential damage.
Lastly, follow installation best practices such as securing the roof cap firmly and using appropriate fasteners to prevent any leaks or instability in your finished product.
How Can I Properly Ventilate My Gazebo Roof Cap To Prevent Moisture Buildup And Maintain The Longevity Of The Structure?
To properly ventilate your gazebo roof cap and prevent moisture buildup, it’s essential to incorporate vents or louvers into the design. By doing so, you’ll maintain proper airflow and help preserve the integrity of the structure.
When installing vents, make sure they’re evenly spaced on all sides of the roof cap for optimal circulation. Additionally, consider using weather-resistant materials like aluminum or vinyl for added durability.
Don’t forget to regularly inspect and clean your vents to ensure they continue functioning effectively in promoting air circulation and preventing moisture buildup.
Can I Create A Functional Yet Stylish Gazebo Roof Cap That Offers Additional Features Such As Lighting Or Weather Protection?
Absolutely! You can create a functional and stylish gazebo roof cap that offers additional features like lighting or weather protection.
By incorporating elements such as solar-powered LED lights, you’ll not only enhance the ambiance of your gazebo but also promote energy efficiency.
To provide weather protection, consider adding a durable, weather-resistant material like metal or fiberglass to your roof cap’s design. This will shield your gazebo from harsh elements while maintaining its aesthetic appeal.
Just remember to account for proper ventilation, as discussed earlier, to prevent moisture buildup and ensure the longevity of your structure.
Conclusion
In conclusion, crafting the perfect gazebo roof cap is an exciting DIY project that allows you to showcase your creativity and personal style.
By considering alternative materials, customizing the design, and ensuring proper ventilation, you’ll create a beautiful and functional focal point for your outdoor space.
Don’t forget to explore additional features such as lighting or weather protection to truly make your gazebo roof cap stand out.
With some careful planning and attention to detail, your gazebo will be the envy of the neighborhood.

Leveling Gazebos On Sloped Concrete: Step-By-Step Guide
How High Can A Gazebo Be?
How to Anchor Gazebo to Concrete without Drilling
About Author
Rohan C.
Rohan wants to build his own dream backyard to get away from their busy home life. And he also helps bring design to life and build it for his customers using high quality products and building techniques. Rohan has provided many colorful ideas including a water fountain, gazebo, pergola, BBQ area, splash pad, sandbox, and decking with a built-in barbecue.