Camp Chef Igniter Replacement: A Guide To Troubleshooting And Repair
If you’re an avid camper or outdoor cook, then you know the importance of having a reliable camp stove. And when it comes to camp stoves, Camp Chef is one of the most trusted names in the business.
However, even the best camp stoves can experience problems from time to time, and one of the most common issues is a faulty igniter. Fortunately, replacing your Camp Chef igniter is a relatively simple process, and with a few basic tools and some know-how, you can have your stove up and running again in no time.
In this article, we’ll guide you through the process of troubleshooting and repairing your Camp Chef igniter. We’ll explain how your igniter works, what tools and supplies you’ll need, and how to diagnose and fix common issues.
Whether you’re a seasoned outdoor cook or a beginner just starting out, this guide will give you the knowledge and confidence you need to keep your camp stove running smoothly. So let’s get started!
Understanding How Your Camp Chef Igniter Works
Understanding how your Camp Chef igniter functions is crucial in troubleshooting and repairing it. The igniter is responsible for starting the fire in your grill or stove, and it relies on a small electric current to create a spark that ignites the gas. The igniter consists of a battery, a wire, and a metal probe that creates the spark.
To use your igniter, you need to press the button or turn the knob that activates it. When you do this, a small electric current is sent from the battery to the wire, which then travels to the metal probe. The probe creates a spark that ignites the gas, and voila! You have fire.
However, if your igniter is not functioning properly, it could be due to a number of issues. Perhaps the battery needs to be replaced, or the wire is damaged.
Understanding how the igniter works can help you troubleshoot and repair it more effectively, so you can get back to enjoying your grill or stove without any hiccups.
Gathering the Necessary Tools and Supplies
Before we get started, let’s make sure we’ve got everything we need to fix this pesky igniter issue. There are only a few things you’ll need, and most of them you probably already have on hand. Here’s a list of the necessary tools and supplies:
- Screwdriver (either Phillips or flathead, depending on your igniter)
- Igniter replacement kit (you can find these online or at your local camping supply store)
- Pliers (to help with removing and replacing wires)
- Safety gloves (optional, but recommended to protect your hands)
- Paper towels or cleaning cloth (to wipe down any dirty or greasy parts)
Once you have all the necessary items, you’re ready to start troubleshooting and repairing your Camp Chef igniter. It’s important to have all the tools and supplies on hand before beginning, as this will save you time and frustration later on.
Before you begin, make sure to read through the instructions carefully and take note of any safety precautions. This will help ensure that you complete the repair safely and effectively. With the right tools and a little bit of patience, you’ll have your Camp Chef igniter up and running in no time!
Troubleshooting Your Igniter
Let’s dive into figuring out what’s causing your grill to refuse to light up. The first thing you should do is check the battery. A dead battery is often the culprit behind a non-functioning igniter.
If the battery is dead, replace it with a new one and try igniting the grill again. If the battery is not the issue, move on to the next step.
Next, check the wiring. Sometimes the wiring can become loose or damaged, causing the igniter to malfunction. Check the wiring connections and ensure they’re tight and secure. If the wiring is damaged, it’ll need to be replaced. You can purchase replacement wiring from a hardware store or online.
If the battery and wiring aren’t the issue, the problem may be with the igniter itself. The igniter may need to be cleaned or replaced. Check the user manual for instructions on how to clean the igniter. If cleaning doesn’t solve the problem, you may need to replace the igniter. You can purchase a replacement igniter from a hardware store or online.
With these troubleshooting tips, you’ll be able to diagnose and fix the issue with your camp chef igniter in no time.
Removing the Old Igniter
To remove your old igniter, you’ll need a few basic tools and a steady hand. First, make sure to turn off the gas supply to your grill and disconnect the propane tank.
Then, use a screwdriver to remove the screws that hold the igniter in place. Be careful not to strip the screws as you remove them.
Once the screws are removed, gently pull the igniter out of the grill. If the igniter is still attached to the wires, carefully disconnect the wires from the igniter. Make a note of which wire goes where so you can attach the new igniter correctly.
After you have removed the old igniter, you can install the new one. But before you do that, take a moment to inspect the area around the igniter for any signs of damage or wear. If there is any damage, make sure to repair it before installing the new igniter.
With the old igniter out of the way, you can now move on to installing the new one and getting your grill up and running again.
Installing the New Igniter
Once you’ve carefully disconnected the wires from the old igniter, you can proceed to attach the new igniter, ensuring that you connect each wire to the correct terminal. Here’s how you can install the new igniter:
-
Take the new igniter and slide it into the hole where the old one used to be. Make sure it’s snugly fit into place.
-
Connect each wire to the correct terminal, ensuring that the connections are tight and secure. You may need to use pliers to crimp the connectors onto the terminals.
-
Once all the wires are connected, test the new igniter by turning on the stove. If it lights up, you’re good to go! If not, double-check your connections and make sure everything is properly connected.
Remember, safety is key when working with electrical components. Always make sure to turn off the power and disconnect any power source before attempting any repairs or replacements.
With these steps, you’ll be able to successfully install the new igniter and get your camp chef stove up and running in no time!
Testing Your New Igniter
Now that you’ve installed the new igniter, it’s time to test it out.
First, check for sparks by turning on the gas and pressing the igniter button.
If you see sparks, you’re good to go.
Next, light your grill by turning on the gas and pressing the igniter button while holding a flame near the burner.
With these simple steps, you can ensure that your new igniter is working properly and ready for your next barbecue.
Checking for Sparks
Wow, nothing feels more frustrating than trying to start your grill and not seeing any sparks. When testing your new igniter, you want to make sure that it’s producing the spark needed to ignite the gas.
To do this, turn off the gas and disconnect the igniter wire from the control module. Hold the wire about ¼ inch away from the burner and press the igniter button. You should see a spark jump from the wire to the burner. If you don’t see a spark, your igniter may not be working properly.
If you’re not seeing any sparks, there are a few things you can check. First, make sure the battery is installed correctly and has enough power. If the battery is good, check the wire connections to make sure they’re secure. Sometimes the wires can become loose during shipping or installation.
If the connections look good, you may need to replace the igniter. Remember, if you’re not comfortable doing the repair yourself, it’s always best to contact a professional. A faulty igniter can be dangerous and should be replaced as soon as possible.
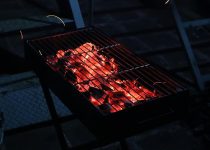
Lighting Your Grill
To light your grill successfully, you’ll need to follow these steps carefully. Don’t rush the process or skip any steps, as doing so can result in a dangerous situation.
Here’s what you need to do:
- Make sure the gas valve on the propane tank is open.
- Turn the burner knobs to the ‘ignite’ position.
- Press the igniter button repeatedly until the burner lights. If the burner doesn’t light after a few tries, turn off the burner knobs and wait a few minutes before trying again.
- Once the burner is lit, adjust the flame to your desired level using the burner knobs.
Congratulations, you’ve successfully lit your grill! Remember to always follow safety precautions when using your grill, and never leave it unattended while in use.
Maintaining Your Igniter
Keeping your igniter in good working condition is essential for hassle-free cooking with your Camp Chef stove. To maintain it, make sure to regularly clean it using a soft cloth or brush. Remove any debris or food particles that may have accumulated on it, as these can affect the igniter’s performance.
If you notice that it’s not working properly despite cleaning, it may be time for a replacement. Camp Chef offers replacement igniters for their stoves, which are easy to install. Simply remove the old igniter and replace it with the new one, following the manufacturer’s instructions carefully.
Remember that a functioning igniter is crucial for your cooking experience. By maintaining and replacing it when necessary, you can ensure that your Camp Chef stove will always be ready to cook up a delicious meal for you and your loved ones.

Outdoor Shower Ideas for Victorian Gardens

Are Painted Bar Chairs the Best Choice for Your Outdoor Space?
Protecting Your Hot Tub Deck From Summer Heat
About Author
Rohan C.
Rohan wants to build his own dream backyard to get away from their busy home life. And he also helps bring design to life and build it for his customers using high quality products and building techniques. Rohan has provided many colorful ideas including a water fountain, gazebo, pergola, BBQ area, splash pad, sandbox, and decking with a built-in barbecue.