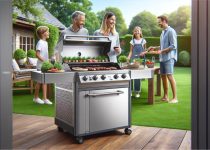
Are You Maximizing Your Outdoor Cooking With the Masterbuilt 800 Control Panel?
Hey fellow grillers, I've been tinkering with the Masterbuilt 800 control panel lately and I'm curious if I'm really making the most of it. This gadget seems packed with features like precise temperature settings and Bluetooth connectivity, which are great for stepping up our grilling game. But sometimes, I wonder if I'm missing some tricks to really nail those perfect smoky flavors. Are there any specific settings or features you swear by? I'm keen to swap notes and see if we can all uncover some hidden gems together! What's been your experience with this beast?
Key Takeaways
- Utilize preset cooking functions like Smoke and Sear to streamline temperature and time settings for optimal results.
- Monitor temperatures closely using the integrated meat probe for real-time updates and precision cooking.
- Customize display settings on the control panel to view only the most relevant information for your cooking needs.
- Take advantage of the Bluetooth feature for remote monitoring and control, ensuring convenience and efficiency.
- Regularly maintain and clean the control panel and associated components to ensure consistent performance and safety.
Understanding the Control Panel
Getting to know the control panel on your Masterbuilt 800 is the first step to becoming a master at outdoor cooking. This thing's packed with features that let you tweak and fine-tune your smoking or grilling like a pro. Let's immerse ourselves in the control customization and panel indicators that give you the upper hand.
First up, control customization. This isn't just about turning knobs and hitting buttons. You can set precise temperatures, adjust smoke levels, and even control cooking times, all from this one panel. It's about making the machine work for your specific culinary vision. Whether you're slow-cooking ribs or searing steaks, you've got the power to dial in the perfect settings.
Now, the panel indicators are your best friends. They keep you informed with real-time updates on everything from current temperature to timer counts. These indicators ensure you're not left guessing what's happening under the hood. A quick glance can tell you if adjustments are needed or if everything's on track.
Understanding and using these tools effectively means you're not just cooking; you're orchestrating a gourmet performance. So, take the time to get familiar, experiment, and truly take control of your outdoor cooking experience.
Setting Up Your Masterbuilt 800
Now that you're familiar with the control panel, let's set up your Masterbuilt 800 to start cooking. The initial setup begins with the unboxing process, which is pretty straightforward but critical. First, make sure you've got a clear space to work in—trust me, it's not fun tripping over stuff with parts in your hands!
Carefully remove all the packaging and lay out the components. You'll want to check everything against the manual's inventory list to make certain nothing's missing or damaged. If there's an issue, it's easier to sort it out now rather than halfway through setting up.
Next, follow the assembly instructions step by step. Don't rush this part; a solid setup means fewer headaches later. Attach the legs and wheels first to give it a stable base, then proceed to mount the main body. Connect any smaller parts like the grease tray and racks. It's all about snapping and screwing parts together—no special tools required.
Before you fire it up, make sure everything is tight and properly aligned. A wobbly smoker is a no-go.
Alright, you're all set! Now, you're ready to explore the world of outdoor cooking with confidence.
Mastering Temperature Control
Mastering the temperature control on your Masterbuilt 800 is vital for achieving perfectly cooked meals every time. I've found that understanding how to manipulate this control can make or break your outdoor cooking experience. Let's delve into some key points that have helped me master this feature.
- Start with Calibration: Make sure your temperature probes are calibrated correctly. This avoids any discrepancies in heat readings.
- Know Your Zones: Familiarize yourself with the different heating zones within your grill. Effective heat distribution is important for even cooking.
- Monitor Constantly: Keep an eye on the temperature display. Don't just set it and forget it; adjustments might be needed.
- Utilize Temperature Probes: Insert the probes into the thickest part of your meat to get the most accurate internal temperature readings.
- Experiment with Settings: Each dish might require a different temperature setting. Don't be afraid to tweak it based on the results you're getting.
Exploring Preset Cooking Functions
Let's get into the preset cooking functions on the Masterbuilt 800. I'll show you how these preset options can make your grilling a breeze and why utilizing them might just be the best way to guarantee perfectly cooked meals.
We'll also look at how these settings interact with the temperature controls to streamline your cooking process.
Understanding Preset Options
Delving into the preset options on the Masterbuilt 800, you'll find a variety of cooking functions designed to simplify your grilling experience. The control panel offers intuitive features that allow for easy temperature customization and mode selection, ensuring you can grill like a pro without constant manual adjustments.
Here's what you can explore:
- Smoke Mode: Set specific smoke levels for that perfect barbecue flavor.
- Sear Mode: High heat for searing meats to lock in juices.
- Bake Mode: Even temperatures for baking pizzas or desserts.
- Roast Mode: Ideal for cooking tender, juicy meats.
- Grill Mode: Adjustable settings for standard grilling needs.
Each option adjusts the temperature and timing, letting you focus more on the flavors and less on the fuss.
Benefits of Preset Modes
Exploring the preset modes on the Masterbuilt 800 reveals how they enhance your cooking process by streamlining temperature and time settings. I've noticed that using these presets not only saves me time but also greatly boosts my mode efficiency. There's no more guesswork or constant checking; I just select the mode that fits what I'm cooking, and it manages the rest. This convenience means I can focus on other prep work or enjoy time with friends and family while my meal cooks to perfection.
The specific settings in each mode are designed to optimize flavor too. Whether I'm smoking ribs or grilling burgers, the results are consistently delicious. These presets make sure that every dish benefits from flavor enhancement, making my outdoor meals a hit every time.
Utilizing Temperature Controls
I've found that mastering the temperature controls on the Masterbuilt 800 greatly enhances the precision of my cooking. The control panel is intuitive, making it easy to manage your cookout with confidence. Here's a quick rundown of how I make the most out of these features:
- Temperature Probes: I always use the built-in probes to monitor internal meat temperatures without opening the lid.
- Even Heat Distribution: The smoker's design guarantees heat spreads evenly, essential for consistent cooking.
- Low and Slow Settings: Perfect for smoking meats; these settings keep the temperature steady over hours.
- High-Heat Searing: Great for grilling steaks, providing that delicious char.
- Keeping Warm: After cooking, this function maintains everything warm until serving.
These features simplify the cooking process, ensuring everything turns out just right.
Utilizing the Bluetooth Feature
Now, let's talk about the Bluetooth feature on the Masterbuilt 800.
I'll show you how easy it's to sync your devices, so you can monitor your cooking from a distance.
Plus, I've got some handy tips to maximize the Bluetooth range, ensuring you stay connected no matter where you're in the yard.
Syncing Bluetooth Devices
To maximize your grilling experience, let's sync your Bluetooth devices with the Masterbuilt 800's control panel. First, check your device compatibility. The Masterbuilt 800 pairs best with recent iOS and Android smartphones. Here's a simple guide to avoid pairing issues and guarantee a smooth connection:
- Turn on Bluetooth: Enable Bluetooth on both your smartphone and the Masterbuilt 800.
- Open App: Launch the Masterbuilt app on your phone.
- Find Grill: Select ‘Add New Grill' in the app settings.
- Connect: Choose the Masterbuilt 800 from the list of available devices.
- Confirm Pairing: Follow any prompts to confirm the pairing, and you're set to monitor your grill remotely!
That's it! You're now ready to enhance your cooking with real-time control and monitoring.
Bluetooth Range Tips
Once you've successfully paired your devices, it's important to understand the Bluetooth range to maintain a stable connection. The Masterbuilt 800 typically offers a decent range, but walls and large objects can cause signal interference. To minimize issues, I always maintain a clear line of sight between my smartphone and the grill.
If I'm experiencing connectivity troubles, I avoid metal objects and appliances that could disrupt the signal. For effective connectivity troubleshooting, I often move closer to the grill or reset the Bluetooth on my device. This usually solves most range issues.
Maintenance and Cleaning Tips
Keeping your Masterbuilt 800 in top condition requires regular maintenance and thorough cleaning. I've learned that taking care of it isn't just about keeping it looking good; it's essential for safe operation and long-lasting performance. Here are some of the key steps I follow to make sure my grill is always ready for the next barbecue session:
- Regularly check and clean the grease tray: This isn't just about cleanliness; it's a major safety precaution. A full grease tray can lead to fires.
- Inspect and wipe down the interior: After each use, once it's cooled down, I give it a good wipe to remove any food particles or grease.
- Clean the grates with a grill brush: Doing this while they're still warm helps to remove residue easily.
- Cover and store properly: I always make sure it's covered and stored in a dry place to protect it from the elements. Proper storage solutions prevent rust and deterioration.
- Check for wear and tear: Before firing it up, I do a quick check on hoses and connections to make sure everything is tight and in good condition.
Accessorizing Your Masterbuilt 800
Accessorizing your Masterbuilt 800 can truly elevate your outdoor cooking experience. I've found that choosing the right accessories not only enhances functionality but also boosts convenience. The right grill cover, for example, is essential. It protects your grill from the elements, making sure it stays in top condition. But it's not just about protection; it's about enhancing longevity and maintaining performance.
Here's a quick guide I put together to help you navigate the world of Masterbuilt 800 accessories:
| Accessory Type | Purpose | Compatibility |
|---|---|---|
| Grill Covers | Protects from weather and dust | Fits Masterbuilt 800 |
| Rotisserie Kit | For even cooking of meat | Compatible with 800 |
| Smoking Racks | Increases cooking capacity | Designed for 800 |
| Meat Probes | Monitors internal temperature | Connects with control panel |
| Rib Racks | Optimizes space; cooks evenly | Fits inside grill chamber |
When you're picking out accessories, always check for accessory compatibility to ensure a perfect fit with your Masterbuilt 800. This guarantees you're not only making the most out of your grill but also safeguarding your investment. Remember, the right tools can make all the difference in mastering the art of outdoor cooking.
Common Mistakes to Avoid
When I first started using my Masterbuilt 800, I made a couple of key mistakes that I've seen others make too. One big error wasn't paying close attention to the temperature settings, which can really make or break your cooking results.
I also used to skip the regular maintenance, not realizing how it could affect the longevity and performance of the grill.
Ignoring Temperature Settings
One common mistake to avoid is ignoring the temperature settings on your Masterbuilt 800, as it can drastically affect cooking outcomes. Getting these settings right is key to mastering your outdoor cooking game.
Here's why temperature matters:
- Temperature consistency: Guarantees your food cooks evenly, avoiding raw or overdone spots.
- Heat distribution: Proper settings provide ideal heat spread across your grill.
- Preventing undercooking: Unsafe food temps can be a health hazard.
- Avoiding overcooking: No one enjoys dry, tough meat.
- Flavor optimization: The right temp can enhance the natural flavors.
Neglecting Regular Maintenance
Neglecting regular maintenance on your Masterbuilt 800 can seriously mess up your grilling performance. It's not just about keeping it looking good; it's about ensuring everything operates smoothly. Regular cleaning and checks can drastically extend the component lifespan. Think about it: grease buildup and debris can lead to malfunctioning parts, and before you know it, you're dealing with preventable repairs.
Moreover, failing to maintain your grill might void your warranty. Most warranties have fine print requiring regular upkeep. If you skip this, you could be out of luck when you need help the most. I always make sure to stick to a maintenance schedule. It's worth the effort to keep grilling without hitches and avoid nasty surprises.
Cooking Tips for Perfect Results
To achieve perfect results, always preheat your Masterbuilt 800 before adding your food. This initial step guarantees that the temperature is stable, providing a consistent cooking environment right from the start. It's vital when you're aiming for that flawlessly cooked meal.
Here's what I've learned to enhance every outdoor cooking session:
- Ingredient Preparation: Always marinate or season your meats and veggies well in advance. This not only locks in flavor but also tenderizes tougher cuts.
- Even Placement: Distribute your food evenly across the grill surface. It prevents cold spots and ensures each piece cooks uniformly.
- Temperature Control: Keep an eye on the internal temperature settings. Adjustments might be necessary depending on weather conditions.
- Timely Flipping: Don't be tempted to flip your food too often. Let it sear properly on each side to create those desirable grill marks.
- Resting Time: After cooking, allow your meat to rest. This helps redistribute the juices, enhancing flavor and tenderness.
Advanced Features Overview
Why not explore the advanced features of the Masterbuilt 800 that can take your grilling to the next level? Let's dive right into some of the standout functions this model offers.
One of my favorite elements is the display customization. It's not just about seeing what temperature you're cooking at; you can adjust the display to show exactly what info you need, when you need it. Whether it's the internal temperature of your meat or the cooking time left, you can tailor the display to fit your cooking style.
Another killer feature is the auto shutoff feature. Ever got distracted only to remember you left the grill on? I've been there. With the auto shutoff, the Masterbuilt 800 takes care of that worry. It automatically powers down after a set amount of time, ensuring safety and energy efficiency.
Here's a quick table to summarize some advanced features you might find useful:
| Feature | Benefit |
|---|---|
| Display Customization | Tailor what you see to suit your cooking needs |
| Auto Shutoff Feature | Enhances safety and saves energy |
| Programmable Cooking Modes | Set and forget for consistent results |
| Wireless Connectivity | Monitor your grill from anywhere |
| Integrated Meat Probe | Get real-time updates on meat temperature |
Each of these features is designed to enhance your grilling experience, making it more intuitive, safe, and efficient. So, are you ready to master your outdoor cooking with these advanced capabilities?
Frequently Asked Questions
Can the Masterbuilt 800 Be Used in Rainy Weather?
I've found the Masterbuilt 800's weatherproof features pretty solid, so it handles rainy weather well. Its design guarantees rainy performance isn't compromised, allowing me to BBQ any time, regardless of a few raindrops!
Is the Masterbuilt 800 Suitable for Apartment Balconies?
I'd say the Masterbuilt 800 isn't ideal for apartment balconies due to space constraints and potentially bothersome noise levels. It's better suited for more spacious, open areas where it won't disturb neighbors.
What Is the Warranty Period for the Masterbuilt 800?
The Masterbuilt 800 comes with a one-year warranty. For extended peace of mind, I'd consider a warranty extension to cover any unexpected issues. Always check the coverage details to know what's included.
Are There Vegetarian Recipes Specifically for the Masterbuilt 800?
Yes, there are specific vegetarian recipes for the Masterbuilt 800. They optimize vegetable grilling and smoker adaptations, ensuring you get the most out of your device. It's great for mastering meat-free options!
Can the Masterbuilt 800 Operate on Solar Power?
I've checked, and the Masterbuilt 800 isn't designed for solar power. Solar efficiency and power conversion aren't built into it, so you'll need a standard power source to fire it up.

How to Cook Pizza on Big Green Egg

Struggling With Traeger Timberline 850 Issues? What You Need to Know
Looking to Upgrade Your Backyard Grill? Check Out the Silverbac by Grilla Grills
About Author
Rohan C.
Rohan wants to build his own dream backyard to get away from their busy home life. And he also helps bring design to life and build it for his customers using high quality products and building techniques. Rohan has provided many colorful ideas including a water fountain, gazebo, pergola, BBQ area, splash pad, sandbox, and decking with a built-in barbecue.