Are DIY Rustic Deck Projects Easy for Beginners?
Building a rustic deck as a DIY project can be easy for beginners. With a solid plan and the right tools, you can manage the construction. Using pressure-treated lumber and following basic steps will help ensure durability and stability. Just remember to take accurate measurements and maintain proper spacing between the deck boards. If you want to discover essential tips and techniques to enhance your deck-building experience, there's more valuable information available.
Key Takeaways
- DIY rustic deck projects can be manageable for beginners with a solid plan and clear measurements.
- Using pressure-treated lumber ensures durability, making it easier for novices to achieve longevity in their builds.
- Basic tools like a circular saw, drill, and level are sufficient for most beginner deck projects.
- Following step-by-step guides simplifies the construction process and helps beginners avoid common pitfalls.
- Regular maintenance, like cleaning and sealing, is crucial to preserve the deck's rustic charm over time.
Understanding the Basics of Deck Construction
When you dive into deck construction, it's essential to start with a solid plan that outlines your measurements and material choices.
Using pressure-treated lumber for your DIY projects ensures durability and longevity.
Remember, proper footing placement is an important part of your deck's structural integrity; make sure those deck piers are level.
Accurate measurement is crucial, especially when cutting joists, which should be spaced 16 inches on center to prevent sagging.
Additionally, utilizing joist hangers can enhance stability.
If you're considering a concrete deck, ensure that the base is well-prepared.
Emphasizing these fundamentals will set the stage for a successful deck-building experience, giving you the confidence to tackle your project efficiently.
Essential Materials and Tools for Your DIY Deck
Building your own rustic deck requires the right materials and tools to ensure a successful project. Start with pressure-treated wood for durability and concrete deck blocks for strong foundational support.
You'll need deck boards that are at least 5/4 in. x 6 in. x 10 ft. for a sturdy surface. Essential tools include a circular or miter saw for cutting, a drill for assembly, a hammer for driving nails, and a level to keep everything aligned.
Don't forget joist hangers, deck screws, and deck joist tape to reinforce the structure. A weed barrier and gravel help prevent moisture and weed growth underneath.
Budget around $350 for materials to manage the cost to build effectively while ensuring you have everything you need for your DIY deck.
Step-by-Step Guide to Building a Rustic Deck
Creating your rustic deck can be a rewarding project that enhances your outdoor space. Start by creating a detailed plan with measurements and layout.
Make sure to use pressure-treated lumber for both the frame and decking boards to ensure durability. For foundation stability, dig footings and place concrete deck blocks, keeping your ground level deck off the ground to prevent rot.
When you cut and install the boards, maintain a consistent spacing of about 1/4 inch between planks for a rustic look.
Finally, finish your deck with a weatherproof sealant or stain to protect the wood and highlight its natural beauty. Allow at least two weeks for the wood to dry before applying any finish.
You can find all your supplies at Home Depot!
Common Challenges and Solutions for Beginners
Many beginners encounter a variety of challenges while embarking on their rustic deck projects. One common issue is accurate measurements and leveling—using a laser level or the 3-4-5 triangle method helps a little bit.
Cutting lumber can also be tricky, but using a miter saw with a laser guide improves precision. When it comes to choosing materials, I highly recommend pressure-treated lumber for durability, especially for ground contact applications.
Proper joist spacing is crucial, so aim for 16 inches on center and use joist hangers for added strength. Lastly, managing deck board installation can be easier with spacers for expansion.
Remember to let everything you need, like the boards, time to dry before securing them with at least two screws per joint.
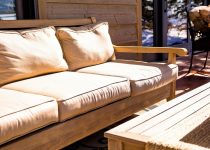
Tips for Enhancing Your Finished Deck
Once you've completed your rustic deck, enhancing it can transform the space into a cozy outdoor retreat.
Start by applying high-quality stains, like Olympic Waterguard, to protect against moisture and UV damage. Incorporate decorative elements such as potted plants, outdoor rugs, or string lights to create an inviting atmosphere.
Choose furniture made from weather-resistant materials to ensure durability while complementing your deck's aesthetic. Consider adding built-in seating or storage solutions to maximize functionality and keep your space organized.
Don't forget about regular maintenance—inspect your deck, clean it, and re-stain or seal every few years to preserve its rustic beauty and uphold its structural integrity.
With these tips, your deck will be a cherished outdoor haven.
Frequently Asked Questions
Is It Hard to DIY a Deck?
DIYing a deck isn't hard if you're prepared. With proper planning, basic tools, and accurate measurements, you can tackle the project confidently. Engaging with resources can make the whole process easier and more enjoyable.
Can I Build a Deck With No Experience?
Yes, you can build a deck with no experience! By following detailed plans, using basic tools, and starting small, you'll gain confidence and skills. Online resources offer helpful tips to guide you through the process.
Is It Easy to Do Decking Yourself?
Yes, you can do decking yourself! With proper planning, the right materials, and guidance from online resources, you'll find it manageable. Just focus on measurements and follow structured steps to simplify the process.
What Is the Hardest Part About Building a Deck?
The hardest part about building a deck is ensuring precise measurements. Even minor errors can lead to structural issues. You'll need to focus on leveling, joist spacing, and fastening systems to achieve a solid result.

10 Pros and Cons of Propane Vs Electric Smokers for Your Outdoor Kitchen
How Does Amish Furniture Enhance Outdoor Living?

How Can Screened Porches Increase Home Comfort?
About Author
Rohan C.
Rohan wants to build his own dream backyard to get away from their busy home life. And he also helps bring design to life and build it for his customers using high quality products and building techniques. Rohan has provided many colorful ideas including a water fountain, gazebo, pergola, BBQ area, splash pad, sandbox, and decking with a built-in barbecue.